LightBlog

samedi 2 juillet 2022

Why I spent $350 on an Amazon Kindle e-reader twice, and would do so a third time

“I love the smell of a book.”

“You just can’t beat the feel of a real book.”

“I really enjoy digging through a physical bookstore and finding what I want to read.”

“I guess I’m just old-fashioned.”

These are all things that I’ve heard from people about why they prefer to read physical books instead of digital ones. They’re also people that have never tried the Amazon Kindle Oasis.

And why should they have? It’s an e-reader that starts at $249.99. When I told my friends that I bought the first one for $359 (the 3G model – it started at $289), they asked me what else it does. Unless you really enjoy reading books, and those books tend to be electronic, it’s hard to justify buying an e-reader with an E Ink display for more money than a base model iPad.

A lot of the people I talk to that still prefer physical books haven’t gone beyond the small screen on their phones to try digital books. Beyond that, some people have tried tablets. But very few of these book lovers have tried an e-reader, or more specifically, one of the Kindles that are popular on Amazon.

When I first decided to get a Kindle, I decided to get a Paperwhite. It was one step up from the base model, but I didn’t think I needed the bells and whistles of the Kindle Voyage, which was the top-tier product at the time.

I absolutely hated the Kindle Paperwhite. Unlike the first and only other Kindle that I had ever purchased – which was the Kindle 4 that was released in 2011 – the Paperwhite didn’t have physical buttons on the sides to turn pages. Remember, that old Kindle didn’t even have a touchscreen (or a frontlight), so buttons were necessary to turn the page. I found this to be a real pain point for the Paperwhite. Without those buttons and having to touch the screen to turn pages, it was nearly impossible to use the device one-handed.

I returned the Kindle Paperwhite. It wasn’t doing anything for me that I really wanted from an e-reader.

Interlude: The pros of using an e-reader

I’ve always used Kindle for my e-books because I use all platforms, and Amazon is the most open among the big ones. I’ve tried Apple, Google, Barnes and Noble Nook, and even Microsoft’s short stint in e-book sales. Amazon also has the best hardware. But ultimately, the services I use tend to be the ones that are most accessible in the most places, and for e-books, that’s Kindle.

Kindle Oasis with comic book open

There are lots of benefits to digital books, and I want to outline that before talking about the Kindle Oasis.

  1. They don’t take up space: I don’t have to carry an extra item in my bag, nor do I have to keep books on a shelf. All of my books are stored on devices.
  2. There’s no more need for bookmarks: Amazon’s Kindle books sync to your account, so no matter if you’re picking up your Kindle device, the Kindle app on your iPad, the web reader online, or the Kindle app on your phone, or anything else, it picks up where you left off. Amazon also owns Audible, which is for audiobooks, and assuming that the title is WhisperSync for Voice-ready, it will even sync your place between the Kindle book and the Audible audiobook.
  3. You don’t have to think about lighting: With e-books, you can read in bed and not have to worry about getting the right lighting that preserves your ambiance and is still bright enough to not hurt your eyes. Kindles have their own lighting, as do tablets and phones.
  4. All of the content is at your fingertips: Just like we can do today with music, movies, and TV shows, you can instantly access any book you want thanks to the Kindle store. This sometimes includes that out-of-print book that you’ve always wanted to get your hands on.

There are also specific benefits to an e-ink e-reader:

  1. Battery life goes from days to weeks: With an E Ink e-reader, battery life simply isn’t something that you think about anymore.
  2. There’s no more glare: If you’re in direct sunlight, an E Ink screen is super-easy to use. You don’t have to worry about adjusting brightness.
  3. Cellular connectivity changes the game: I wasn’t sure which section to include this in, but I mentioned it specifically in reference to e-ink e-readers because Amazon actually offers free cellular service on Kindles, as long as you pay the premium when you buy the device. And why shouldn’t it? You’re using the service to buy its products. Of course, this also means that if you’re reading on a train or somewhere else that doesn’t have Wi-Fi, it’s going to sync your place in the book you’re reading, and you can buy new books on the go.

Introducing the Amazon Kindle Oasis

After I returned my $119 Kindle Paperwhite, I just used a tablet for my reading. The $199 Kindle Voyage didn’t seem like something that would solve my pain points, and if it did, I didn’t think it was worth trying.

Soon after, Amazon announced a new device that I had previously covered in leaks: the Kindle Oasis. I had seen the leaked design, and it seemed like a radical, weird, and frankly dumb idea. But when it was formally announced, it all made sense, and I wanted one.

Hand holding Kindle Oasis

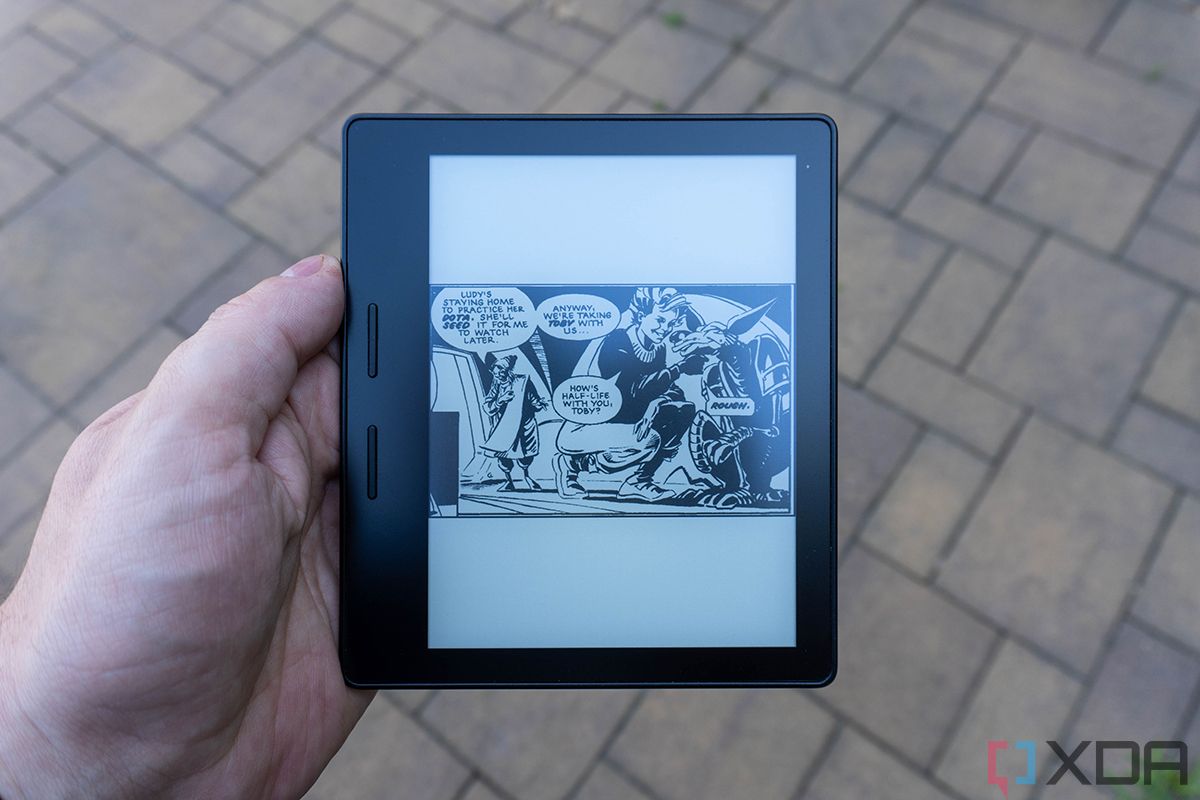
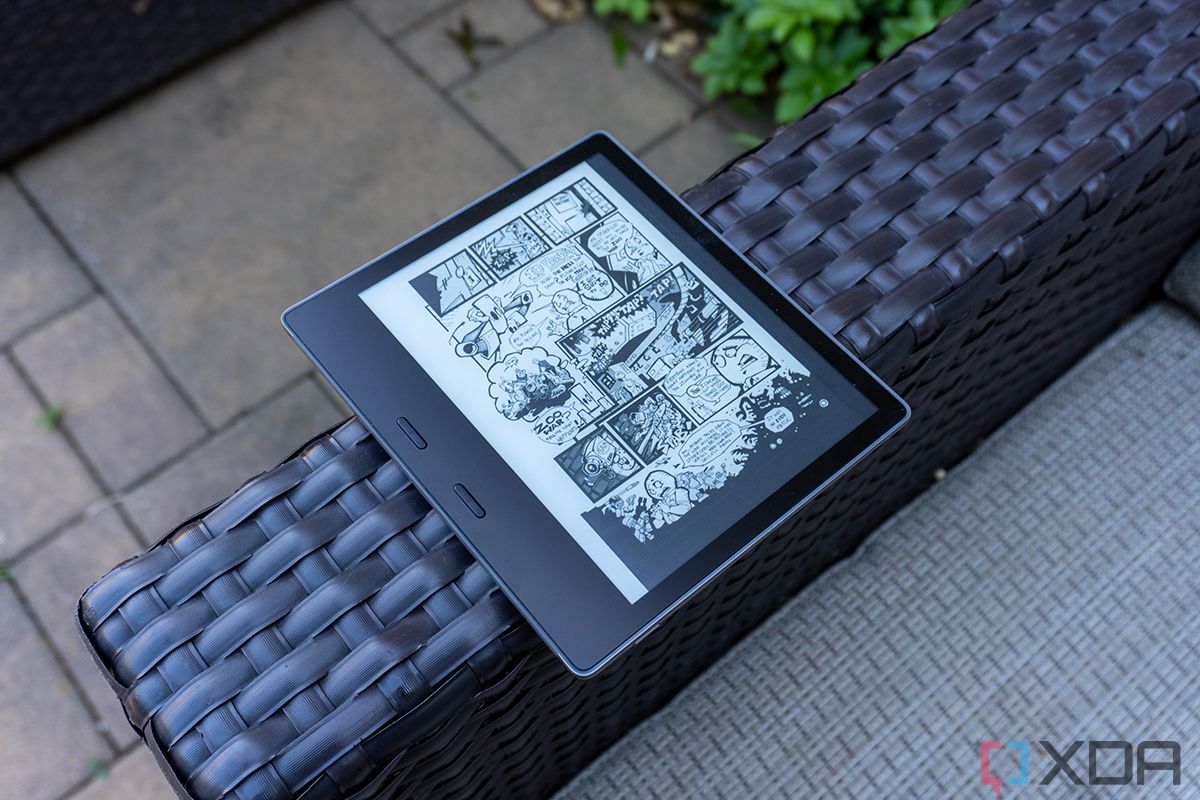
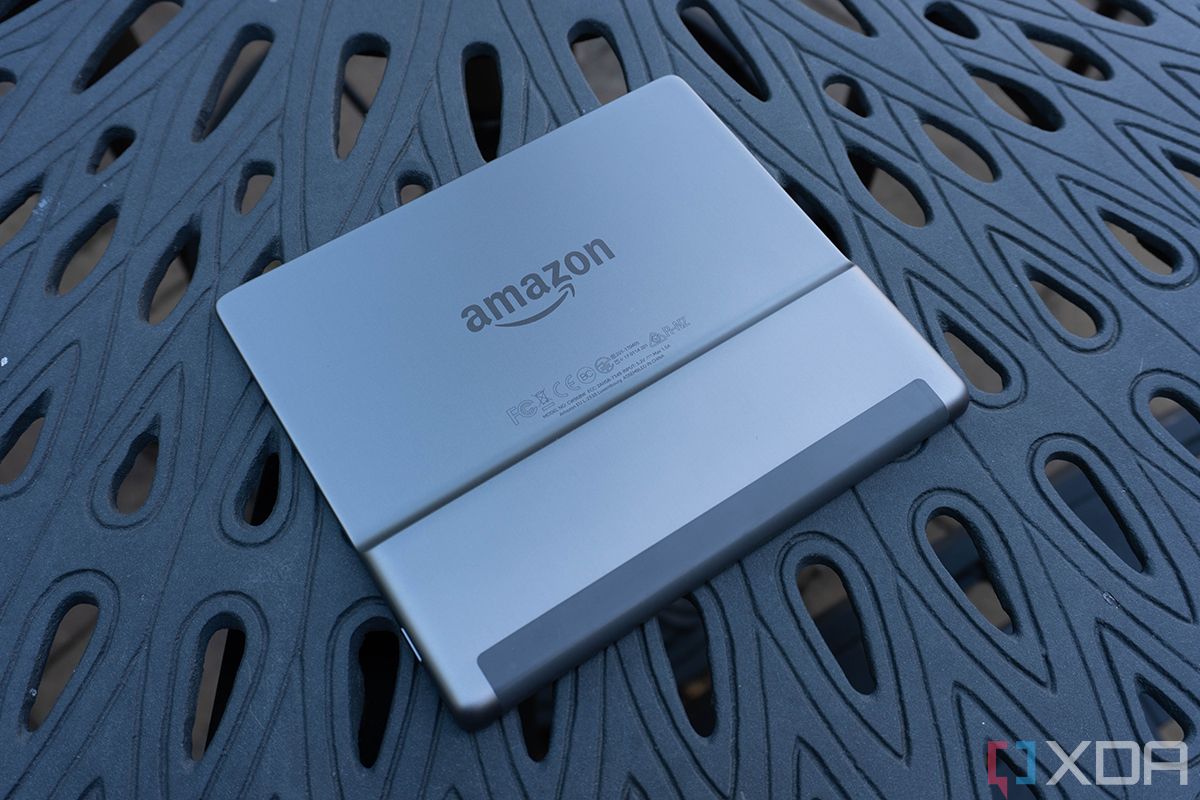
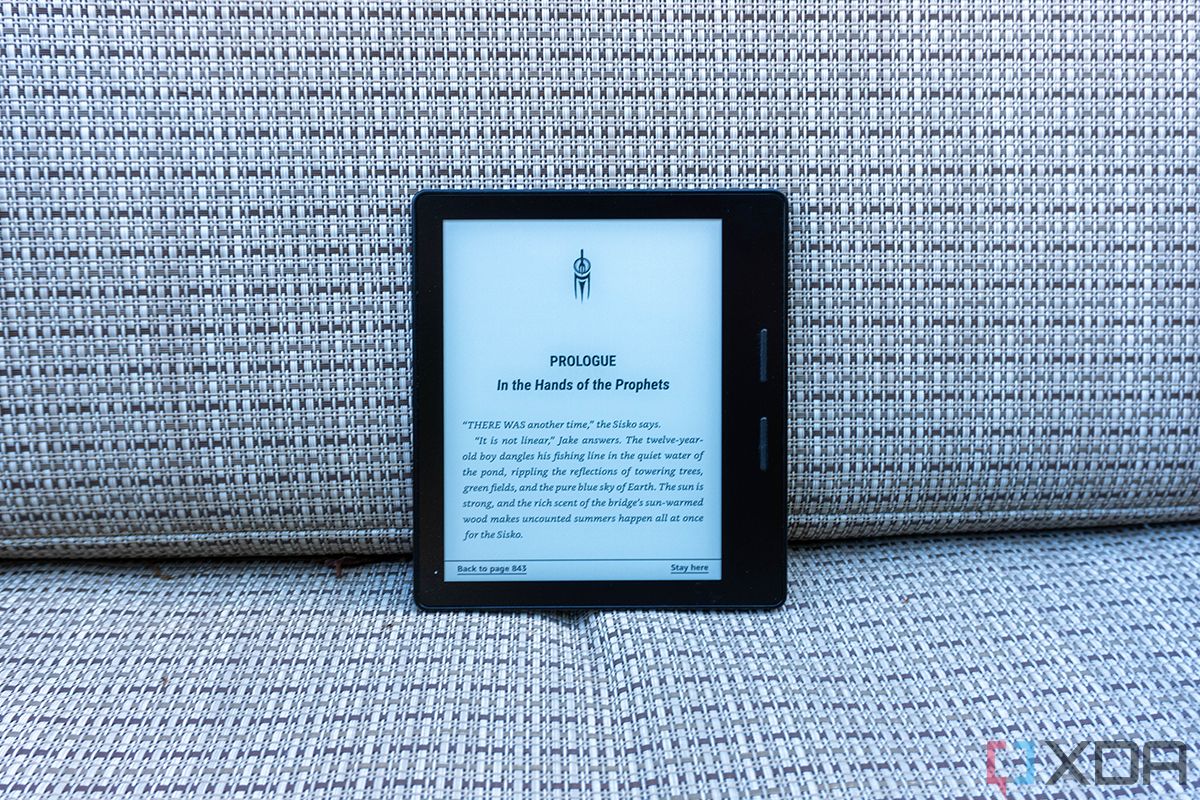
The Kindle Oasis (from the eighth-gen Kindle family) was designed for one-handed use. In fact, it didn’t appear symmetrical, one of the things that made the design seem too radical. One side, referred to as the spine, was thicker, making it easier to grip with one hand. On top of that side were two buttons for turning pages. Moreover, the Oasis was the first Kindle to have an accelerometer, so if one hand got tired, you could move it to the other hand and the screen would know to flip over. Immediately, the right-handed device could become a left-handed device.

That’s not all though, because it weighed just 4.6oz (4.7oz for the 3G model). Since the guts of the device were in the thicker spine, the rest of it – the part that included the 300ppi display – was ultra-thin. It was 0.07-0.18 inches thick, and it was amazing.

Battery cover pins on Kindle Oasis

Considering that this was the thinnest and lightest Kindle ever, Amazon made battery compromises to get there. It came with a battery cover, which would keep it charged for months, according to Amazon.

It was also the most expensive Kindle ever, starting at $289.99. It wasn’t enough for me though. I spent $359.99 on the 3G model. Like I said above, spending the extra for cellular on a Kindle is a no-brainer. Why would I shell out so much money for an e-reader, only to not solve the pain point of connectivity on-the-go?

I absolutely loved this product. It’s the perfect e-reader when I’m out and about, and when I’m lying on my back in bed. This thing was designed mostly without flaws, and I use it to this day.

The one flaw came in the way of the battery case. I always had issues connecting it, and I even had mine replaced at one point. It turned out that I wasn’t the only one.

Along came the second Kindle Oasis…and the compromises

When Amazon announced its second-generation Kindle Oasis, from the ninth generation of Kindle products, I was instantly on board. The first-gen model was what I’d referred to as game-changing tech. It was something that I wasn’t sure I actually needed, and then fit into my life as something that I couldn’t live without. At the time, I’d have been willing to upgrade every year if the improvements were good enough; after all, I belong to the group of people who already have regular upgrade cycles for phones, tablets, and smartwatches.

First and second gen Kindle Oasis models side by side

Still 300ppi, the new Kindle Oasis boasted a bigger screen at seven inches. That sounded nice. Unfortunately, it was also heavier at 6.8oz, and thicker at 0.13-.33 inches. At that point, it wasn’t that much lighter than my 7.6oz Kindle Paperwhite that I had returned. Still, I figured the weight distribution would be mostly in the spine. I bought the 4G LTE model for $349.99.

The big change that made it thicker and heavier wasn’t just the bigger screen; it had a bigger battery, no longer using pins to connect to a battery case. I kept the product, and I enjoyed it, but eventually, I just gravitated back to the first-gen model.

Second gen Kindle Oasis face down

Amazon stuck with this design for the third iteration of the Kindle Oasis (10th-gen), which is the current one. It’s still the best e-reader you can buy. It now has USB Type-C and has light temperature adjustments. If you buy one, you’ll absolutely love it. However, that’s also because you probably haven’t experienced the first-gen model.

How Amazon could get me to spend $350 on another Kindle Oasis

All I really want is a Kindle Oasis with the design of the first one and the upgrades that the other models have received. I’d love USB Type-C and for it to be waterproof, maybe with a spec bump for better responsiveness.

I’d also love to see 4G LTE. My original Kindle Oasis came with 3G, and as of 2021 when carriers started shutting down 3G, it doesn’t work anymore. The only way it can access the internet is via Wi-Fi.

One thing that I really don’t care about is battery life, and Amazon needs to stop fighting that battle as well. One of the big selling points of the E Ink e-reader is weeks of battery life, and I’m more than happy to sacrifice the four weeks that I’d get with a regular Kindle and turn it into one or two weeks with something that’s as thin and light as the first one. I think most would feel the same way.

Kindle Oasis stood up displaying The Fall of the Prophets

When it comes to battery life, your usage and your thought process adjusts to what the capabilities of the device are. As I write this, I’m on a train and my phone’s battery is somewhat low, and there’s a low level of anxiety that comes with that. Even with just a week of battery life, charging is still something that’s not a concern on an e-reader. If you get down to charging it once every day or two, that’s when it really becomes a concern. But as long as charging remains an afterthought, it’s fine. There’s no need to push it to months of battery life.

I could be wrong. Everyone I know that has purchased the larger second- or third-gen models absolutely loves it. That’s fine too. Amazon could call this wishlist Kindle as the Kindle Oasis Mini, and I’d buy it in a heartbeat. After all, I spent $349 on the bigger and supposedly better second-gen Kindle Oasis, and the first-gen one is still the one I use.

    Amazon Kindle Oasis
    The Amazon Kindle Oasis has a seven-inch 300ppi display, it's waterproof, and it comes with a unique design that's made for one-handed use.

The post Why I spent $350 on an Amazon Kindle e-reader twice, and would do so a third time appeared first on XDA.


from XDA https://ift.tt/nGe7tR6
via IFTTT

These are the best chargers for the Apple MacBook Pro 13 M2 (2022)

Apple’s Mac lineup keeps on evolving with every passing year. Last year, the company revealed the MacBook Pro (2021) models — featuring a notch, a wide variety of ports, and the return of the MagSafe. You can even grab one of these refurbished MacBook Pro models if you find their regular prices too high. Following the chassis redesign, Apple introduced the MacBook Pro 13 (2022). It packs the all-new M2 chip in the classic Pro notebook body that includes a Touch Bar. While it might not appeal to the fan of the notched Macs, it still is a solid choice for plenty customers. The MacBook Pro M2 (2022) comes with one of the best chargers — a 67W one. However, you might find yourself needing a different unit. Whether you have lost it, would rather use another brand, or just have your own reasons, we have plenty of excellent options for you.

    Amazon Basics 65W Charger

    Affordable

    If you don't want to spend a fortunate on a MacBook Pro charger, then the Amazon Basics option is quite decent. It offers a maximum of 65W through one port.
    Belkin 68W Charger

    2 Ports

    This Belkin dual charger is my personal favorite. It offers two ports and maxes out at 68W (combined). It's ideal for those who want to charge their MacBooks and iPhones simultaneously.
    Anker PowerPort III 120W

    4 Ports

    This station from Anker offers up to 120W output at a time, with the main port supporting up to 100W. It's ideal for those with plenty of devices or accessories.
    Anker PowerPort III 100W

    2 Ports

    If 4 ports are too much, Anker also has a 2-port 100W charger. You can split the 100W between the two ports or utilize it all through one port.
    UGREEN Nexode 100W Charger

    2 Ports

    This 100W dual charger is similar to the previous one from Anker. It comes with a cheaper price tag, though. It's ideal for those on a relatively limited budget.
    Baseus 100W Charging Station

    4 Ports

    This Baseus 4-port charging station also has a 100W output. You can utilize it through a single port or distribute it between several of them.

It’s not a bad idea to buy two chargers if you use your MacBook Pro (2022) in two different locations — like home and office — frequently. This way you can just leave a charger in each place and avoid carrying the accessories on a daily basis. It’s also a good idea to keep one as a spare unit in case the included one suddenly dies or breaks for whatever reason. You wouldn’t want your workflow to suddenly stop one day — when you least expect it.

If I had to pick one of these chargers for my MacBook Pro (2022), I would surely go for the Belkin 68W Charger. It is simple, comes from a reputable company, and offers a second port in case I want to charge another device simultaneously. Ultimately, all of these MacBook Pro (2022) chargers are excellent and should last you for a long time.

Which of these MacBook Pro (2022) chargers are you buying, and why? Let us know in the comments section below.

The post These are the best chargers for the Apple MacBook Pro 13 M2 (2022) appeared first on XDA.


from XDA https://ift.tt/vNIJZuQ
via IFTTT

Asus Vivobook S 14X OLED review: OLED never looked this good

The Asus Vivobook S 14X OLED is among the first on the market to have a 120Hz OLED display, which is pretty sweet. After all, OLED laptops are delightful to begin with, and Asus absolutely invests in using the technology in its screens. Adding the high refresh rate on top of that is a chef’s kiss.

Unfortunately, there are some drawbacks in the product. It still uses a 720p webcam, and the 45W Intel 12th-gen processor isn’t paired with any dedicated graphics. In fact, performance wasn’t even on par with units I’ve tested with less powerful processors.

Overall, however, the Asus Vivobook 14X OLED has the best display that you’ll find on a laptop right now, so it offers a pretty great experience.

    Asus Vivobook S 14X S5402
    The Asus Vivobook S 14X S5402 packs some premium features at a reasonable price, with a 120Hz OLED display, a powerful CPU, and more.

      Features:

      Pros:

      Cons:

Navigate this review:

Asus Vivobook S 14X OLED pricing and availability

  • The Asus Vivobook S 14X OLED costs $1,099.99
  • The model that Asus sent for review is a Costco exclusive, and it’s a better deal than the other configuration

The Asus Vivobook S 14X OLED S5402 model is available now, and the model that the company sent me for review is exclusive to Costco. It includes an Intel Core i7-12700H, 12GB DDR4 memory, a 512GB SSD, and of course, a 14.5-inch 2.8K 120Hz OLED display.

There are other configurations, of course. In fact, while the model that Asus sent me comes in Midnight Black, it also comes in colors like Solar Silver and Sandy Grey. However, if you’re not a Costco member, there’s some bad news. There’s a Core i5 SKU, which will be available from vendors like Amazon, Best Buy, and B&H, it’s actually the same price as the Core i7 SKU that comes from Costco at $1,099.99.

Asus Vivobook S 14X OLED: Specs

Processor Intel Core i7-12700H Processor 2.3 GHz (24M Cache, up to 4.7 GHz, 6P+8E cores)
Graphics Intel Iris Xe
Body 32.23 x 23.09 x 1.79 ~ 1.79 cm (12.69″ x 9.09″ x 0.70″ ~ 0.70″), 1.63 kg (3.59 lbs)
Display Screen-to-body ratio: 87 %
14.5-inch, 2.8K (2880 x 1800) OLED 16:10 aspect ratio, LED Backlit, 0.2ms response time, 120Hz refresh rate, 550nits peak brightness, 100% DCI-P3 color gamut, 1,000,000:1, VESA CERTIFIED Display HDR True Black 500, 1.07 billion colors, Anti-glare display, 70% less harmful blue light, SGS Eye Care Display, Screen-to-body ratio: 87 %
Memory 12GB DDR4
Storage 512GB M.2 NVMe PCIe 4.0 SSD
Ports 1x USB 2.0 Type-A
1x USB 3.2 Gen 1 Type-A
2x Thunderbolt 4 supports display / power delivery
1x HDMI 2.0a
1x 3.5mm Combo Audio Jack
Keyboard Backlit Chiclet Keyboard, 1.4mm Key-travel
Camera 720p HD camera
With privacy shutter
Audio Smart Amp Technology
Built-in speaker
Built-in array microphone
harman/kardon (Mainstream)
with Cortana and Alexa voice-recognition support
Battery 70WHrs, 3S1P, 3-cell Li-ion
Power supply TYPE-C, 90W AC Adapter, Output 20V DC, 4.5A, 90W, Input: 100~240V AC 50/60Hz universal
Colors Midnight Black
Solar Silver
Sandy Grey
OS Windows 11 Home
Price $1,099.99

Design: It’s made of aluminum with a subtle design

  • It comes in Midnight Black, Solar Silver, and Sandy Grey
  • There are two USB Type-A ports, but one of them is USB 2.0

The model that Asus sent me for review is Midnight Black, but it also comes in Solar Silver and Sandy Grey. You can really just think of it as a black laptop. Unlike other OEMs, Asus didn’t use any shiny branding on the exterior design. Indeed, there’s Asus Vivobook branding that’s embossed on the lid with black text.

Top-down view of Asus Vivobook S 14X

It’s made out of aluminum, weighing in at 3.59 pounds. This is lighter than laptops that have dedicated graphics, but heavier than ultrabooks. After all, the Asus Vivobook S 14X does sort of sit in its own class between being an ultrabook and being a powerful creator laptop. It’s got the 45W H-series CPU, but it doesn’t have dedicated graphics.

Side view of Asus Vivobook S 14X

As far as ports go, Asus makes a critical mistake in my opinion. On the left side, there’s a USB 2.0 Type-A port. Personally, I think USB 2.0 should have died a fiery death by now, but unfortunately, it hasn’t. The right side has a USB 3.2 Gen 1 port, so that means that as an end user, you have to know the difference between the two USB Type-A ports on the device.

For example, if you go to plug in a 4K webcam, you’ll absolutely need to use the one on the right side, but if you don’t know the difference between the two, it’s going to take a little while to figure out what’s wrong. You might even think that one port is broken before realizing the difference between USB 2.0 and USB 3.2 Gen 1.

Side view of Asus Vivobook S 14X

Also on the right side is an HDMI 2.0 port and dual Thunderbolt 4 ports, both of which can be used for charging. Obviously, Thunderbolt 4 also gets you goodies like 40Gbps data transfer speed, the ability to connect an external GPU, and the ability to connect two 4K monitors or one 8K monitor on a single port. What’s neat about the ability to connect an external GPU is that since this has an H-series processor already, it can be a work laptop on the go, but when you get home, you can use that single-cable solution to connect a powerful graphics card and turn this into a gaming laptop.

Display: The Asus Vivobook S 14X has a best-in-class display

  • The 14.5-inch screen is 2,880×1,800 OLED with a 120Hz refresh rate
  • The webcam is unfortunately 720p

One of the really cool things that we’re starting to see on the PC market is high refresh rate displays. As tends to be the case with anything that’s actually useful and new in PC hardware, it originated with the mobile market. Prior to that, high refresh rates were targeted exclusively at gamers, and the problem with gaming displays is that they’re usually not actually good for anything but gaming. Now, we’re actually seeing some really nice consumer displays that have high refresh rates and are also pleasant to look at.

Close up of Asus Vivobook S 14X display

We’ve seen 120Hz displays, and we’ve seen 90Hz OLED displays, but Asus is giving us a 2.8K 120Hz OLED display, which is the best display I’ve seen on a laptop so far. When you turn on the high refresh rate in Settings, it’s a delightful experience.

The only problem with these high refresh rate displays on Windows laptops is that they absolutely drain battery life. Intel’s processors just can’t do the same things on laptops that Qualcomm’s processors can do in phones. And on top of that, this laptop has a power-hungry processor.

ASUS Vivobook S 14X display test

From my testing, the Asus Vivobook S 14X supports 100% sRGB, 95% NTSC, 97% Adobe RGB, and 100% P3, which is really impressive. The point is, you don’t even need to turn it up to 120Hz for this to be one of the best displays on a laptop. It’s just great.

ASUS Vivobook S 14X display test

The display test above shows what you’d expect from an OLED display, with the black level staying the same from 0% brightness to 100%, and a high contrast ratio at 13,240:1.

Close up of Asus Vivobook S webcam

The webcam has a physical privacy guard, but the bad news is that the camera is still 720p. FHD webcams are becoming more and more popular, and if you take a lot of video calls and meetings, you’ll probably want a higher quality webcam.

Keyboard: It’s average, which is fine

  • The Chiclet-style keyboard is fine, but that’s it

One thing that I’ll say about the keyboard is that it’s accurate, which is probably the most important thing. There weren’t any missed keystrokes or double keystrokes. Other than that though, it feels pretty average. In general, the keyboard is pretty loud, and it doesn’t have the same solid feel that you’d get from a Lenovo ThinkPad or an HP EliteBook.

Top down view of Asus Vivobook S 14X keyboard

As you can see, it has standard Chiclet-style keys, and of course, it is backlit. It has some unique bits, such as an orange Esc key and markings on the Enter key, which might be helpful visual enhancements for some.

The touchpad is fairly large, which is nice. I’d love to see it get even larger in a future iteration of the product, but that’s fine for now.

Close up of power button

The power button doubles as a fingerprint sensor, and since there’s no IR camera, that’s your only method of biometric authentication on this device. It works well, scanning your fingerprint when you press it rather than after it boots up.

Performance: H-series processors without dedicated graphics isn’t too impressive

  • The Intel 12th-gen processor is 45W, but it doesn’t benchmark well

The Vivobook S 14X S5402 unit that Asus sent me includes a Core i7-12700H, 12GB RAM, and no dedicated graphics. Unfortunately, that’s not very good. I feel like it’s becoming more common for certain brands to use H-series processors without a dGPU, and I don’t like it. I’ve spoken with major OEMs like HP that have done it in the past, and they always end up rolling it back in the next generation of the product.

The 45W CPUs that I’m talking about are traditionally found in gaming laptops and mobile workstations. They’re for people that need all of the power that they can get, and they tend to be paired with powerful dedicated graphics. Laptops that are made for productivity usually have U-series processors, which are 15W, although some of them are now coming with 28W chips.

Front view of Asus Vivobook S

The additional CPU power obviously comes with a cost to the battery, but it’s without a significant gain in performance. If you’re doing creative work, you probably want to look for something with dedicated graphics, and that can be a lower-tier dGPU like an Nvidia GeForce RTX 3050 for things like Photoshop and Lightroom. For productivity, you won’t see any meaningful gains from a 45W CPU.

The integrated Iris Xe graphics are exactly the same as the ones found in a Core i7-1260P, with 96 execution units and clocked at 1.4GHz. The clock speed is a bit higher than what’s found in the graphics in the Core i7-1255U.

The Core i7-12700H in the Asus Vivobook S 14X S5402 also doesn’t benchmark well. Shockingly, the scores were lower than what I got on a laptop with a Core i7-1255U, a 15W processor with integrated graphics. To be clear, these units were plugged in with the power slider set to best performance. I even did a factory reset on the Vivobook and ran the tests again, trying to find a way for it to do better. It didn’t.

Asus Vivobook S 14X
Core i7-12700H
Dell Inspiron 14 2-in-1
Core i7-1255U
Dell XPS 15 9520
Core i7-12700H, RTX 3050 Ti
Lenovo Yoga 9i 14
Core i7-1260P
PCMark 10 5,233 5,305 6,640 5,616
3DMark: Time Spy 1,202 1,507 4,535 1,678
Geekbench 1,510 / 6,014 1,711 / 6,700 1,774 / 11,580 1,736 / 9,525
Cinebench 1,629 / 9,015 1,724 / 6,797 1,797 / 11,695 1,638 / 7,757
CrossMark (overall / productivity / creativity / response time) 1,356 / 1,389 / 1,342 / 1,300 1,428 / 1,450 / 1,464 / 1,265 1,855 / 1,735 / 2,052 / 1,671

You can see how it compares to the rest of Intel’s lineup, with the latest U-series Core i7 and the new P-series Core i7, but I also wanted to show the difference in scores when compared with a laptop that has the same processor and some lower-tier dedicated graphics. However, please note that both Geekbench and Cinebench are exclusively CPU tests, so the Vivobook should, in theory, match up with the Dell XPS 15 9520 on those two tests. I was unable to get it to do so.

Battery life was around three hours with the screen set to 120Hz, and around five hours with the screen set to 60Hz, which is about what I’d expect. Lots of companies quote big battery life numbers, but this is what it usually ends up being when you actually plug in a realistic use case.

I also have to say that I did less battery testing with this laptop than I do with others. The method is always to set the power slider to balanced and the screen brightness to a comfortable level, but performance really ended up being such a pain point here that I just got frustrated with not having it plugged in.

Should you buy the Asus Vivobook S 14X OLED?

The big feature with the Asus Vivobook S 14X is the display, of course, and it’s not for everyone.

Who should buy the Asus Vivobook S 14X S5402:

  • People that want the absolute best in display quality
  • Gamers that want productivity on the go and have an external GPU to connect when at home
  • Customers that want a lot of value for the price

Who should NOT buy the Asus Vivobook S 14X S5402:

  • Creators that need dedicated graphics
  • People that want a general productivity laptop
  • People that attend a lot of virtual meetings

The problem with the Asus Vivobook S 14X is that I have a hard time figuring out exactly what category this fits in. I wouldn’t call it a creator laptop; after all, I edited all of these photos on it and frankly, it was lacking when it was on battery life. And at the same time, people that want a productivity laptop would be better served with a U- or P-series processor. Still, you do get a 2.8K 120Hz screen for $1,100, so there’s a lot of value there.

The post Asus Vivobook S 14X OLED review: OLED never looked this good appeared first on XDA.


from XDA https://ift.tt/kgDpl8v
via IFTTT

How to change the Wi-Fi network on an Amazon Echo and Echo Show

A working Wi-Fi connection is an essential part of owning an Amazon Echo. Without it you can’t really do, well, anything. So when it comes to the time you get a new wireless router, for example, it’s important to get moved over as quickly as possible. Especially if your Echo and Alexa are central to your smart home setup.

Fortunately, changing to a new Wi-Fi network is straightforward and all you need is your phone and the Alexa app. Detailed below are the steps that apply to all Amazon Echo smart speakers as well as the Echo Show and Echo Spot devices with displays.

How to change the Wi-Fi network on an Amazon Echo

  • Enable Bluetooth on your phone and open the Alexa App.

Amazon Alexa (Free, Google Play) →

‎Amazon Alexa (Free, App Store) →

  • Trigger in the settings under Wi-Fi Network and follow on-screen prompts.
  • For Echo Show and Echo Spot, use the built-in display to access the Settings menu.

Amazon Echo

For this, you’ll want to make sure that you’re in the same room as the Echo and that Bluetooth is enabled on your phone. Then, open up the Alexa app and follow these steps.

  1. Select Devices.
  2. Select Echo & Alexa.
  3. Select your device.
  4. Select Settings.
  5. Select Wi-Fi Network and follow the on-screen instructions.

These may vary from device to device, but the basic steps involve holding down the action button on the speaker for around 15 seconds. From here you’re going to be waiting for the light to go orange before continuing.

The Alexa app puts your Amazon Echo into its setup mode and then pairs it to your new Wi-Fi network. Once complete, you’ll hear a message from your Amazon Echo and the orange light will have been replaced by a blue one.

How to change the Wi-Fi network on an Amazon Echo Show or Echo Spot

Amazon Echo Show 8

If you’re using an Amazon Echo device with a display then the process is a whole lot simpler. All you will need to do is to open the settings, usually by swiping down from the top and tapping the cog on the display.

Next, find the Network menu, open it and then simply select the Wi-Fi network you want to connect to. Since you have an on-screen keyboard, you’ll enter passwords here, too.

    Amazon Echo (4th Gen)
    The Amazon Echo is the best all-around smart speaker for most people with a nice design, great sound and the immense power of the Alexa ecosystem at its disposal.

The post How to change the Wi-Fi network on an Amazon Echo and Echo Show appeared first on XDA.


from XDA https://ift.tt/hvXZ1oW
via IFTTT

Black Shark 5 Pro Review: Pushing the Snapdragon 8 Gen 1 to its hot limits

Black Shark is a gaming smartphone brand that’s been around for a while. It’s backed by Xiaomi (not owned by, as the company fervently reminds the tech community) and typically packs high-end hardware in a more affordable package. Now the Black Shark 5 Pro is here, and it’s more of the same with physical triggers that can be mapped to touch inputs to help your game.

If you’re looking for a powerful smartphone that looks decent, then the Black Shark 5 Pro might well be up your alley. However, it might also be worth waiting for what’s to come after the Snapdragon 8 Gen 1 before taking the plunge on a gaming smartphone, as the Snapdragon 8 Plus Gen 1 promises to fix a lot of the shortcomings of the preceding flagship chipset.

With the Black Shark 5 Pro, there are a lot of problems that you mightn’t be able to get over, and that includes poor battery life, intense heat, and the lack of a headphone jack. If you’re interested to learn more, then read on.

    Black Shark 5 Pro
    The Black Shark 5 Pro is the latest gaming phone from the Xiaomi-backed company, but there are a lot of problems with it that may not necessarily command the price tag.

      Features:

      Pros:

      Cons:

Navigate this review:

Black Shark Pro 5: Specs

Specification Black Shark 5 Pro
Dimensions & Weight
  • 163.83mm x 76.25mm x 9.5mm
  • 220g
Display
  • 6.67-inch AMOLED
  • 1080 x 2400 (full HD+)
  • 144Hz refresh rate
  • Up to 720Hz touch sampling rate
  • 1300nits peak brightness
  • HDR10+
SoC
  • Qualcomm Snapdragon 8 Gen 1
    • Adreno GPU
RAM & Storage
  • 8GB LPDDR5 +128GB UFS 3.1
    • 6400MHz RAM
  • 12GB+256GB
  • 16GB+256GB
Battery & Charging
  • 4,650 mAh battery
  • 120W fast charging support
  • Supports QC/PD
Security Side-mounted fingerprint scanner
Rear Camera(s)
  • Primary: 108MP, f/1.75
  • Ultra-wide: 13MP, f/2.4
  • Macro: 5MP
Front Camera(s) 16MP, f/2.45
Port(s)
  • USB Type-C
  • No headphone jack
Audio Stereo speakers
Connectivity
  • 5G NR (SA/NSA)
  • 4G
  • 802.11 a/b/g/n/ac/ax dual-band Wi-Fi
  • Bluetooth 5.2
  • NFC
Software JoyUI 13 based on MIUI
Other Features Shoulder triggers

About this review: Black Shark sent us the Black Shark 5 Pro for review. The company did not have any input into the contents of this review.


Black Shark 5 Pro: Design

  • Not an overly “gamer” look
  • Camera barely protrudes
  • Comfortable to hold

Back of the Black Shark 5 Pro

The Black Shark 5 Pro’s design can simply be described as “gamer” — though it’s not over-the-top like I’ve seen from some other gaming brands. It has a soft-touch glass on the back, with a small icon that lights up on the back. I expected that this would be usable as a notification LED (makes sense, right?) but that’s not the case. It doesn’t do a whole lot, though there are some settings in the software that you can modify to make it react to things like phone calls.

It’s a pretty thick phone, but it’s still comfortable to hold thanks to the rounded back edges. The camera doesn’t take up a huge amount of space either, nor does it protrude much, even though it packs a pretty large 108MP sensor. The display is also completely flat, with a single-centered punch-hole selfie camera.

The back camera of the Black Shark 5 Pro

The shoulder triggers on the Black Shark 5 Pro are pretty cool

Where this phone is unique in its design is the implementation of two trigger buttons on the right-hand side. They’re not always active, and you need to swipe a release mechanism to allow them out to be pressed. When they’re not released, they are flush with the rest of the chassis of the phone.

Those shoulder triggers have to be mapped to touch inputs to be used in games, as games won’t recognize them as an official controller input. Nevertheless, they’re pretty cool, and it’s not too big of a deal to map them to your favorite games. It takes a bit of setup, but I’ve noticed in games like COD Mobile that it does make a difference, as in my case, I no longer need to claw my hands over the display to aim and shoot effectively. When not gaming, they can also be assigned other functions — for example, they will also take photos in the camera app by default.

Black Shark 5 Pro shoulder triggers

For a gamer phone, the Black Shark 5 Pro doesn’t have a lot of unique gamer design, and that’s not really a bad thing. Companies like RedMagic have been known to go a bit overboard in that department, whereas the Black Shark 5 Pro can go unnoticed as just a normal smartphone.

For the display, the Black Shark 5 Pro packs a 1080p flat AMOLED screen that goes up to 144Hz. At first glance, it sounds like a bad thing that it’s full HD 1080p and not 1440p, but there’s a reason for that. Higher resolutions require more computational power, so gaming phones often pack 1080p displays to push as high of a frame rate as possible.

The speakers are really loud and sound very good

There are two speakers, both a top and bottom-firing one. The top speaker I’ve noticed sounds a little tinnier, even though it’s a separate speaker to the earpiece. I’m not sure why that is as I would have expected them to be the same, given that they’re located in the same place on each side and separate from the earpiece. Nevertheless, the speakers are really loud and sound very good, so it’s not a big complaint that I have anyway. There’s no headphone jack either, which is a little strange for a gaming phone.

Black Shark 5 Pro: Gaming experience

  • Good performance
  • No thermal throttling makes for a very hot phone
  • Should have waited for the Snapdragon 8 Plus Gen 1

The “latest and greatest” chipset is a bit of a misnomer when it comes to the Snapdragon 8 Gen 1, and that’s thanks to all of the problems that consumers have been facing with it. It runs quite hot, drains a lot of battery, and doesn’t offer a huge amount by way of performance improvements over the Snapdragon 888. The Black Shark 5 Pro makes the most of it though and does the best that it can, sometimes to its own detriment.

We ran a gamut of tests on the Black Shark 5 Pro, and while the results were impressive, they were also alarming. CPU Throttling Test raised the temperature of the device to dangerous levels, with heat dissipating through the shoulder triggers at much higher rates than the rest of the phone. The shoulder triggers began to hurt my fingers from the heat. CPU Throttling Test is an unrealistic CPU load to be put on a smartphone, but I ran into similar heating issues when playing The Simpsons: Hit & Run through AetherSX2.

The Black Shark 5 Pro packs top specifications though, and it gives the results to match. We also ran Geekbench 5 and 3DMark’s Wild Life test, and those results lined up with what we expected too. The phone heats up a lot, but that’s par for the course: both with the Snapdragon 8 Gen 1, and with this being a gaming phone. We’d place more of the responsibility for that on the Snapdragon 8 Gen 1 than on Black Shark, although Black Shark did choose performance over throttling despite the heat.

Playing The Simpsons: Hit & Run was a pleasant experience, and the game runs near flawlessly. I played with a 2x internal resolution, and the game ran at more or less 60 FPS at all times. The phone heated up a lot, but the reduced thermal throttling was noticeable here as the game continued to run well despite the phone feeling like it was going to burn my fingers off. We measured the game’s performance with GameBench, and the results were as good as you’d expect.

Black Shark 5 Pro performance metrics

Black Shark 5 Pro Simpsons Hit and Run Framerate graph

To be honest, I can’t help but wonder if it would have been a smarter choice to dial up the thermal throttling just a little bit. An 83% thermal throttle is impressive, but it’s clear that the trade-offs are nigh-on dangerous. You can’t game on this phone intensively for a long time because it starts to hurt. Those temperatures probably aren’t safe for the phone’s battery, either.

This is one of the most powerful phones that I've tested with the Snapdragon 8 Gen 1

This is a powerful smartphone (and one of the most powerful that I’ve tested with the Snapdragon 8 Gen 1), but that’s only because it takes risks. With Snapdragon 8 Plus Gen 1 devices around the corner, it’s a shame that Black Shark didn’t wait it out. From our testing, it’s already a much more efficient chipset, and I think that gaming phones will stand to benefit a lot from it.

The best part of the Black Shark 5 Pro when it comes to power and battery life is the fact that it supports bypass charging. Bypass charging means that your phone will run off of the charger, not using any battery, and not charging up your phone either. It generates less heat (something that is sorely needed with this phone, to be fair), and in theory, safeguards your battery as a result.

We would like to give special thanks to the team at GameBench for the tool they provided us. Their tool makes it possible for any person, whether it be a regular user,  journalist, or engineer, to test a mobile game’s performance on an Android device. 


Black Shark 5 Pro: Camera

Look, nobody is buying a gaming phone for its camera. If you want a phone that takes good photos and has all of the over-the-top gaming features you may have heard of, there’s practically nothing on the market. Having said that, the Black Shark 5 Pro’s camera gets the job done as a decently usable smartphone camera that you can use in a pinch. Though if you care about picture quality that much, it’s not beating any top camera phones by any stretch of the imagination.

IMG_20220625_172738

For context, the Black Shark 5 Pro has a single 108MP primary camera, a 13MP ultra-wide camera, and a 5MP telephoto macro lens. That telephoto lens allows for actually useable macro shots, which is a plus over the 2MP macro cameras that manufacturers still to this day throw into phones.


Black Shark 5 Pro: JoyUI

The Black Shark 5 Pro runs JoyUI, the company’s own modification of MIUI. It looks the same and performs the same, with the same launcher, multi-tasking menu, and even the same control center when pulling down from the top right-hand side. It’s basically just a rebrand of MIUI with some green accents and a couple of hardware-specific features. That’s not a bad thing because I like MIUI, but it’s not a huge deviation from it whatsoever.

With JoyUI, you get all of the features that you’ve come to expect from MIUI. You get a fancy always-on display (with a ton of customization options), you get second space, and you get the quick ball if you’re into that. JoyUI is pretty heavy-handed in changes when compared to other Android variants, but to some, that’s a large part of its charm.

There are features here that integrate with the shoulder triggers though, and do it a whole lot better than I expected them to. For example, popping out a shoulder trigger and pressing it when the camera is open will take a photo, and you can enable them to do other things throughout the system, too. They’re not just for gaming, which I appreciated as I was worried that this was essentially just a gaming phone with no thought to the cohesiveness around the rest of the device.

I'm impressed by the level of thought that's been put into making the shoulder triggers a valuable part of the user interface

Overall, it’s more of Xiaomi’s MIUI, with some additional features. I’m impressed by the level of thought that’s been put into making the shoulder triggers a valuable part of the user interface, though, rather than making them an afterthought.


Miscellaneous

Security

To unlock your smartphone, the Black Shark 5 Pro supports both face unlock and a capacitive fingerprint sensor that’s inside of the power button. It’s almost certainly a bit of a cost-saving measure that there isn’t one in the display, but it’s no big deal really. It works well.

Audio

I know I already mentioned how good the speakers are, but it’s worth another moment to get across just how good they are. They’re loud — really loud — and are great for gaming. Black Shark did a great job here. I do need to point out the lack of a headphone jack though, as it’s an essential feature in a gaming phone. Bluetooth audio has latency, and it’s noticeable when gaming.

Battery life and charging

We touched on this already in the gaming experience section, but battery life really isn’t good. Bypass charging helps in the gaming area when you need to keep your phone powered, but the battery life you get out of the box isn’t great. Expect to get, maximum, five hours of screen on time, and it’s very likely you’ll get a lot less — especially when gaming. 120W charging is amazing when you need it and can charge this phone from 0% to 100% in 15 minutes, but it’s not always worth having super fast charging and then having terrible battery life. I’d personally rather have slower charging and a longer battery, especially because there are massively diminishing returns between 65W charging and 120W charging.

Bootloader unlocking, kernel sources, and software updates

You can unlock the bootloader of a Black Shark phone using Xiaomi’s MIUI unlock tool. It’s a bit of an involved process, though.

As for kernel sources, Black Shark basically never releases them. If you want to use custom ROMs or anything like that on your smartphone, this probably isn’t the phone to get. Software updates are also a bit hit or miss in that regard.


Should you buy the Black Shark 5 Pro?

The Black Shark 5 Pro offers a lot of good, but there are a lot of reasons to look elsewhere, too. The kernel source and update situation is particularly alarming, as companies are obligated under the GPL to release timely kernel sources. Some companies, such as OnePlus, have published kernel sources late but still typically always get to them at some point. Black Shark, however, just hasn’t released any kernel sources from the Black Shark 2 or newer.

Even aside from that, the phone itself heats up incredibly when gaming, to the point that I worry it can cause harm and injury. Between that, the lack of a headphone jack, and the battery life concerns, there’s just not a lot that Black Shark gets right for a gaming phone. The shoulder triggers are cool and work well, but that’s the only genuinely unique feature about this phone that you can’t really get anything like anywhere else.

As a result, if what you want is a gaming phone, it’s probably worth waiting to see what’s around the corner — particularly anything that may be powered by the Snapdragon 8 Plus Gen 1. There are too many trade-offs here, and for €799, there’s probably much better on offer. I love the speakers, I love the shoulder triggers, but I’m really not a fan of anything else with this phone.

    Black Shark 5 Pro
    The Black Shark 5 Pro is the latest gaming phone from the Xiaomi-backed company, but there are a lot of problems with it that may not necessarily command the price tag.

The post Black Shark 5 Pro Review: Pushing the Snapdragon 8 Gen 1 to its hot limits appeared first on XDA.


from XDA https://ift.tt/QwSscuW
via IFTTT

How to create a Discord bot and add it to your server

Discord has evolved a lot over the years and it now stands as a reliable platform for not only gamers but for anyone looking to connect with their peers over messages, video chat, and more. Many even use it as an alternative to WhatsApp and other popular messaging applications, especially thanks to its great emphasis on groups and communities. Discord has millions of daily active users and a good chunk of those use a bot on a day-to-day basis to automate things. If you use Discord in any capacity then there’s a good chance you’ve used a bot. If you’re wondering how to create one yourself then you’re in the right place. In this article, we’ll tell you how to make a Discord bot:

Navigate this article:

Prerequisites

Creating a Discord bot is a relatively simple task. You do need a little bit of programming knowledge to set things up, but the complexity of the code depends on the kind of bot you’re trying to make. Let’s take a look at a few things you need to get started. First, you need a Discord account, which you probably have. If not, you can create one for free by heading over to the Discord homepage. You can also download the Discord client and use it on your gaming laptop or even a phone.

Once done, you need to set up your own server to use the bot. You can then invite the bot to your server easily by following a few simple steps. Once the bot has arrived on your server, you can then code a function for it and use it in your server or assign it to other servers to which you have admin rights. To assign a bot function, we’ll use Node.js to access the discord.js Node library. You can download the latest version of Node.js from the official website.

Additionally, we’ll also need a code editor to write and modify the bot functions. We’ll be using Visual Studio Code in this tutorial, although you’re free to use whichever you like.


How to create and add a Discord bot to your server

The first step is to create an application on Discord for your bot to work. The idea here is to generate a token for your bot so that Discord recognizes the code. For this, you’ll need to head over to Discord’s applications page. You’ll be sent directly to the page once you log in with your Discord account where you’ll see a list of your apps. Don’t worry if the list is empty because we’ll be creating one now.

  • Hit the New Application button to get started.
    discord bot apps page
  • Now, give a name to your application and hit Create.
    name your discord bot page
  • It’ll now take you to a page in which you can enter details such as your app’s description, add tags, an app icon, and more. Once done, hit the Save Changes button to proceed.
  • Now, look for the Bot option in the menu list on the left sidebar. Tap on it to open the Bots page and press the Add Bot button. Allow permission to create the bot when prompted.
    Add bot to your server page
  • You’ll now see a security token for your bot on the next page. If the token hasn’t been generated, simply tap on the Reset button to create a new token. Copy this token ID as we’ll need it in the following sections.
  • This particular token allows you to control the bot, meaning you shouldn’t share this with anyone. If you think this token has been compromised, then simply come back to this page and hit the reset button to create a new one.
    Bot token in discord
  • Now, look for the OAuth2 option in the menu on the left sidebar and click on it to find your CLIENT ID. It’s a long string of numbers that you need to copy and paste to this URL below — replace the word CLIENTID with the actual CLIENT ID that you just copied –
    https://discordapp.com/oauth2/authorize?&client_id=CLIENTID&scope=bot&permissions=8
  • Simply paste this particular URL into your web browser and hit enter. It’ll open a page in which you can tell Discord where to send your bot. Select the server to which you want to add your new bot from the dropdown menu like so –
    Invite discord bot your server
  • Click on Continue and confirm whether or not you want to grant Admin rights of the server to your bot. You can grant or revoke the admin rights later too, so don’t sweat over this option.
  • Once you add the bot to your server, you’ll see a message confirming the arrival of the bot. That’s how you’ll know it worked. You’ll also see the bot in the members’ column on the right side.
    Test bot added to server

Well, that’s it, you’ve now created a Discord bot for your server. If you followed all the steps carefully, you should be able to see the bot on your server. The bot will stay offline until you define a function for it with a code, and sync it with the Discord platform. This is where the real work begins as you’ll set up a few parameters and tell your bot what you want it to do.

How to assign bot function and host a Discord bot

Now, follow the steps below to create and host a discord bot on your PC:

For this tutorial, we’ll be creating a simple ‘Ping-Pong’ Discord bot which, as the name suggests, will reply with ‘Pong’ every time you type ‘Ping’.

  • Create a new folder anywhere on your PC or Mac. We created a ‘New Folder’ on the Desktop in our Windows PC for this tutorial.
  • Now, open Visual Studio Code and create a new file with the code mentioned below. Replace “Paste your bot’s token here without quotes” with the bot’s token you copied earlier.

    DISCORD_TOKEN= “Paste your bot’s token here without quotes.”


    Visual studio code for .env discord bot with token
  • Next, create a new file and add the following code. Once done, save this particular file as bot.js within the same folder. This code will add the function to your Discord bot. It’ll reply with “pong” every time you type “ping”.

    require(‘dotenv’).config();
    const Discord = require(“discord.js”);
    const client = new Discord.Client({intents: [“GUILDS”, “GUILD_MESSAGES”]});
    client.on(“ready”, () => {
    console.log(`Logged in as ${client.user.tag}!`) })
    client.on(“message”, msg => {
    if (msg.content === “ping”) {
    msg.reply(“pong”);
    }
    })
    client.login(process.env.DISCORD_TOKEN);


    Visual studio code for bot function
  • Now, open the terminal window from the New Folder that you created and install the Discord.js library using the following command. You’ll need Node.js installed on your system for this to work, so keep that in mind.

    npm install –save discord.js dotenv


    Windows powershell with discord.js code for bot
  • The next step is to create a package.json file. Use the following command to create it:

    npm init -y


    create a package json file
  • Lastly, you can now use the “node bot.js” command to run the bot.
    command to run the discord bot

As soon as you run the node bot.js command, you’ll notice that the Discord bot in your server will be online. You can then test the bot by typing ‘ping’ to which it will respond ‘pong’.

Discord bot now live

You can also create a Discord and host it in the cloud for others to use. For that, you’ll have to use an online IDE such as Replit to host your code.

The complexity of the coding process depends on the function you want to assign to your bot. The coding process for a simple ‘Greeting Bot’, for instance, isn’t going to be as complicated as, say, a ‘Music Bot’ that can play music from your preferred platform. You can also create a bot to moderate your server and even kick members that repeatedly break rules in your server. There are tons of useful Discord bots out there, so the possibilities are endless, really. Top.gg is a good place to look for Discord bots if you don’t want to go through the hassle of coding. Just pick up a bot from the website and make changes as necessary to modify the bot according to your needs. There are plenty of options to choose from so be sure to use the search bar on the top to find what you’re looking for.


Well, that brings us to the end of this particular tutorial. There are a ton of useful Discord bots out there right now, so we highly recommend doing a Google search to see if somebody’s already created a bot to automate your process. And before you leave, we also suggest you join XDA’s Discord server in which you’ll find like-minded individuals and also stay up-to-date with all things XDA. So which Discord bot are you going to create first? Let us know by dropping a line in the comments below.

The post How to create a Discord bot and add it to your server appeared first on XDA.


from XDA https://ift.tt/gCEvQsN
via IFTTT